

The ORC has long been over but I am still making progress on my bathroom update. In my One Room Challenge inspiration board I chose a photo of a natural wood vanity. I love the contrast of light wood with black and white accents. My cabinets are a dark brown and although it would have been so much easier to paint them I thought why not try to lighten them. I knew if it turned out terrible I could always paint them.
My bathroom inspiration board…

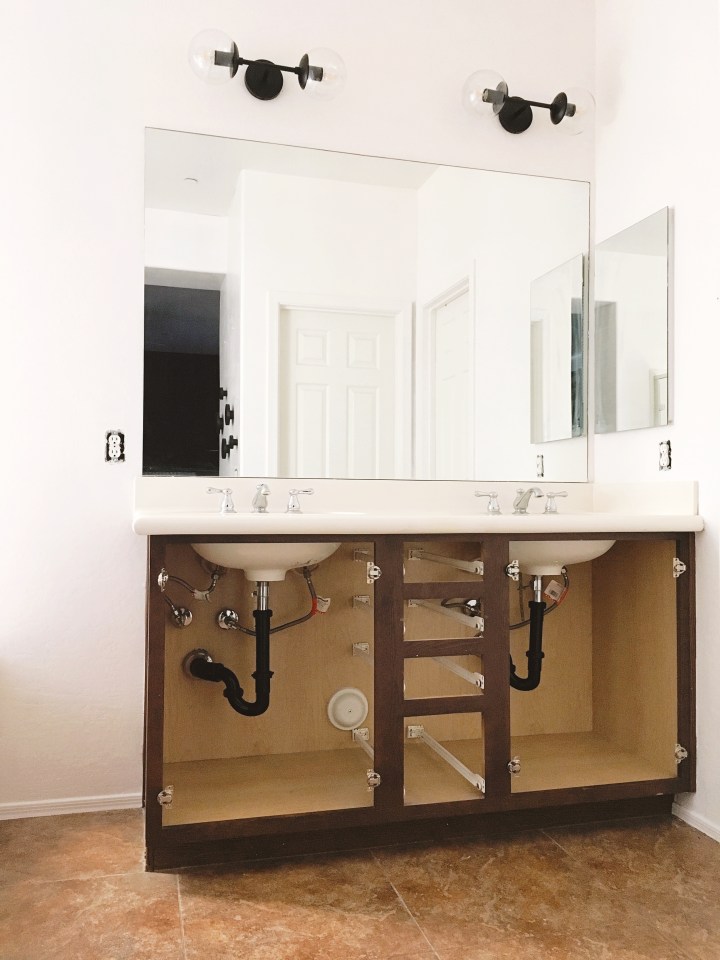
The current state of my bathroom…

The first step was removing all of the cabinet doors and drawers. This was the perfect opportunity to clear out all of the unnecessary odds and ends like old makeup, lotions and hair products.
Materials Needed…
Paint brush
Plastic Wrap
Paint Scraper
Disposable container
60 grit Sandpaper
Mask
Protective eyewear
Rubber Kitchen Gloves
Bleach
Towel
Varathane Crystal Clear No Odor Interior Polyurethane
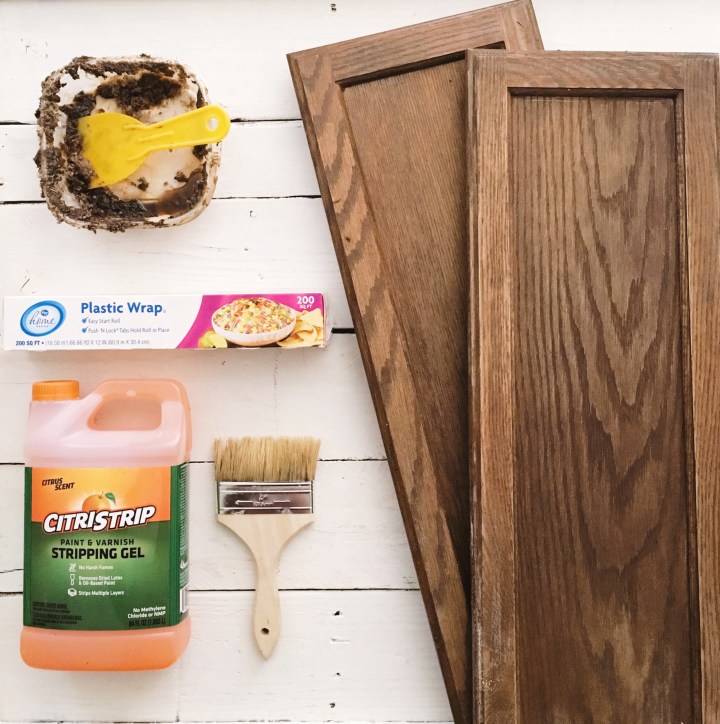
I took the cabinets and drawers down to the garage where I put a coat of citrus strip on them. I prefer to put a thick layer on and cover it with plastic wrap to sit overnight. This usually only requires one or two applications to get the clear seal and layers of stain to scrape off easily.
It is important to scrape the wood before the gel dries. Scrape the goo into a disposable container and continue scraping until you get all of it off the piece of wood. Then either reapply the citrus strip if there is still more of the original clear finish remaining or wipe it clean with a wet towel.
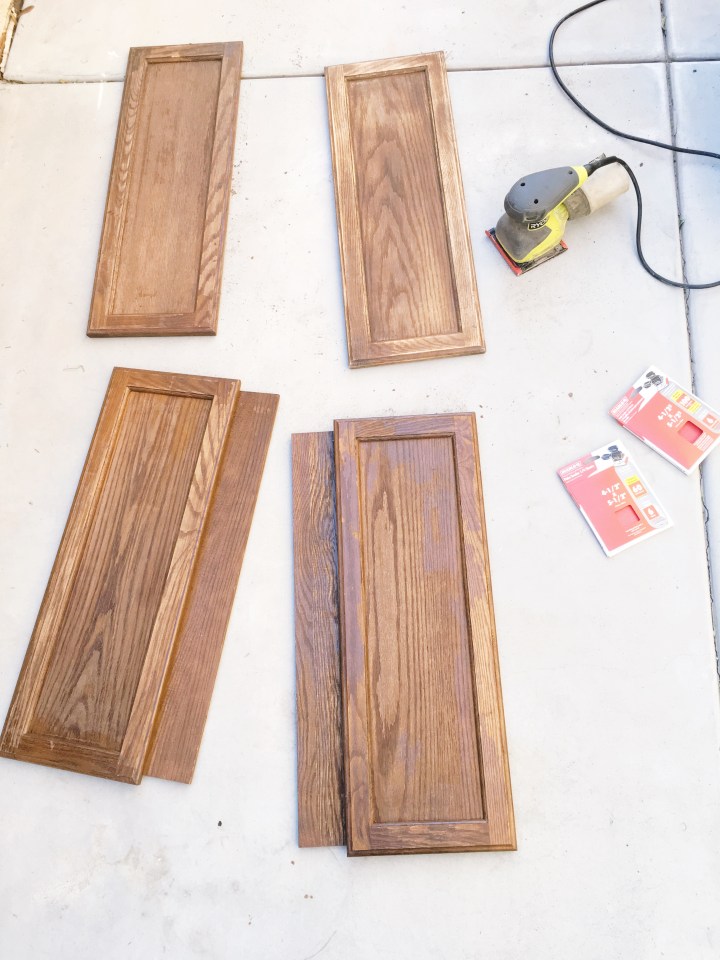
Once the gel is removed and the wood has dried it is time for sanding. Sanding is the step that makes the biggest difference in the color of the wood. I used a 60 grit sandpaper so I could get as much of the dark stain off of the wood cabinet as possible. I used one piece of sandpaper per two cabinets.
The cabinet doors and drawers sanded differently. The drawers ended up much lighter and closer the the color I was hoping to achieve while the cabinets were darker and still orange toned.

Next, I cleaned them off with a wet towel and allowed them to dry. In order to achieve the lightest natural wood color possible I used regular household bleach. Wearing rubber kitchen gloves to protect my hands I poured bleach onto a towel and wiped it all over the cabinets and drawers. I let the wood absorb the bleach completely before applying another coat. I repeated this about 5 times until I was happy with the color. What I love about the bleach is it tones down the orange-i-ness of the wood tone.


The vanity went through the same process. First the citrus strip, then the sanding and finally the bleach. The results are totally worth the time and labor of this project.
Finally, once all of the wood was matching it was time to seal. I always use this clear seal because it never turns yellow and it dries super fast.

I suggest a minimum of three coats but 5 or more will really get that smooth wipeable feel. The last thing to do is attach the cabinets and stand back to enjoy.

After

Before
Now time to seal with those floors!
